Pages

Showing posts with label LST. Show all posts

Sunday, March 20, 2016

The Color Clock

For unit 3 of Light, Sound, and Time we learned a lot about different time telling devices. Some were made in ancient times like the sun dial, water clock, and later came the pendulum clock. We also looked at GMT, which is Greenwich, England time, and basically this was the first place to make time zones. For the action project we had to create a time telling device off of a device that has been made, but making it our own, with our own twist. The one I designed was The Color Clock, mainly made for young people, so that that they can have a fun way telling time. This is better than it's competitors because it keeps a simple design, making it user friendly to almost anyone who buys it. Something I liked was that we got to make our time telling device, because it was a bit of a challenge, since a lot of ideas have been done. Please enjoy seeing my new way to tell time!


References:  
Vispute, Satyajeet. "Candle Clock: History, Facts, and Limitations." Buzzle. Buzzle.com, 2015. Web. 17 Mar. 2016.

Tuesday, March 1, 2016

Diddley Bow

In unit 2 of Light, Sound, and Time we focused on sound, how fast it can travel, and what it can travel fastest through. We also looked at waves, and how frequency plays a big role in understanding a wave, and with that we looked at the Doppler effect. Then we looked at instruments and how they produce sound, and how they can change frequencies, and this is how we learned about harmonics. Leading me to this action project, we are building a diddley bow, a type of guitar that only has one string on a piece of wood that uses a tin can. The materials used are a piece of wood (to use as a base), a tin can (to amplify the sound), a battery (to use a nut) and nails to hold everything down. I am most proud of having all materials in a short amount of time, and being able to build my guitar in the best way I could.

NVA "Diddley Bow" (2016) GCE Lab School
NVA "Diddley Bow Drawing" (2016) GCE Lab School
My diddley bow creates sound when the string vibrates, moving molecules in the air. The tin can helps with amplifying the sound to make it more audible. You could also use a slide on your string to check out different frequencies it can make. The diddley bow demonstrates a lot of key science concepts we went over like sound waves, because this is something that can actually produce sound waves. For frequency, it is shown by the tightness of the string we used, and the material we chose to use. From frequency we can then look at the wavelength and amplitude of the waves, and what they will look like. If it has a high pitch then the wavelength is shorter but the amplitude is the same. If it has a lower amplitude, then the volume is quieter.

The Doppler effect is where sound’s frequency can change according to a certain observer, when the source of the sound is moving. If I were running while playing my guitar and one man was standing behind, meaning I am running away from him, he would be hearing a lower pitch, because the sound waves get stretched out. If I were running towards him playing it, it would have a higher pitch because I am keeping up with the sound waves, so the frequency is higher.

For the string, the length is 15 inches and the thickness is 0.045 inches. To find the volume I need to do pi times radius squared times the height. The height is 4.25 inches and the radius is 1.6875, and using the formula, the volume of the guitar’s body (the can) is 38.02 inches cubed.


NVA "Diddley Bow Harmonics" (2016) GCE Lab School 

The picture above shows the harmonics involved with my guitar. Hertz (Hz) is the frequency unit, and centimeters are talking about the wavelength for each harmonic. To find each new harmonic you multiply the original frequency by whichever harmonic you are trying to find. So for the third I multiplied 117.92 by 3. For wavelength you do the opposite, you divide, so I would do 296.03 divided by 3.

I would not do anything differently, because I feel like I built my guitar in a special way, and that it turned out very well. One minor thing would be dulling the screws, because they do poke out of the bottom, which could be dangerous. Something I would do is sand them down, or just put a piece of wood under it to connect, so that they are completely covered. Below is audio of me playing my diddley bow.

Tuesday, February 9, 2016

Lights, Camera, Action!

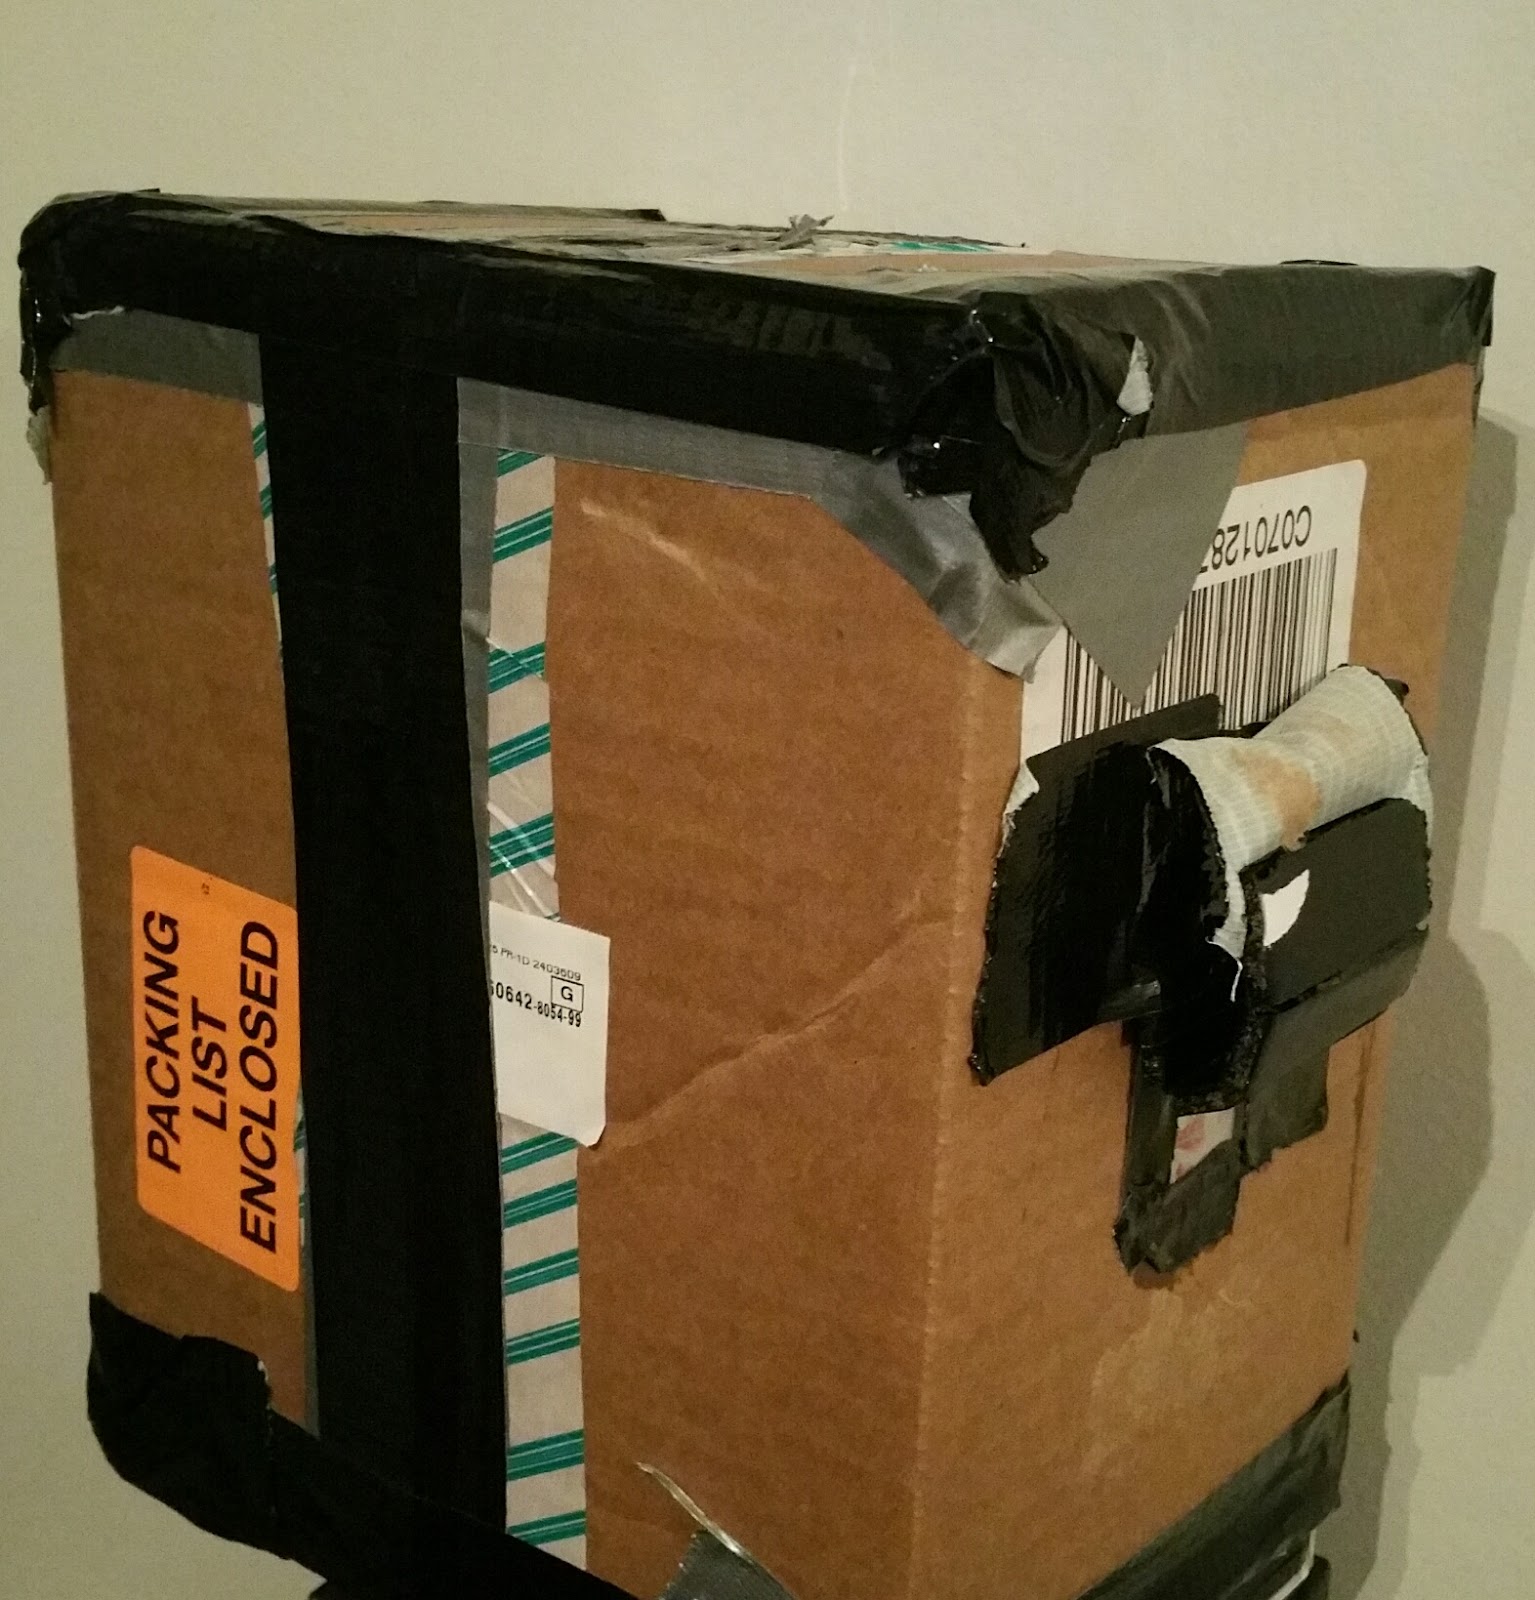
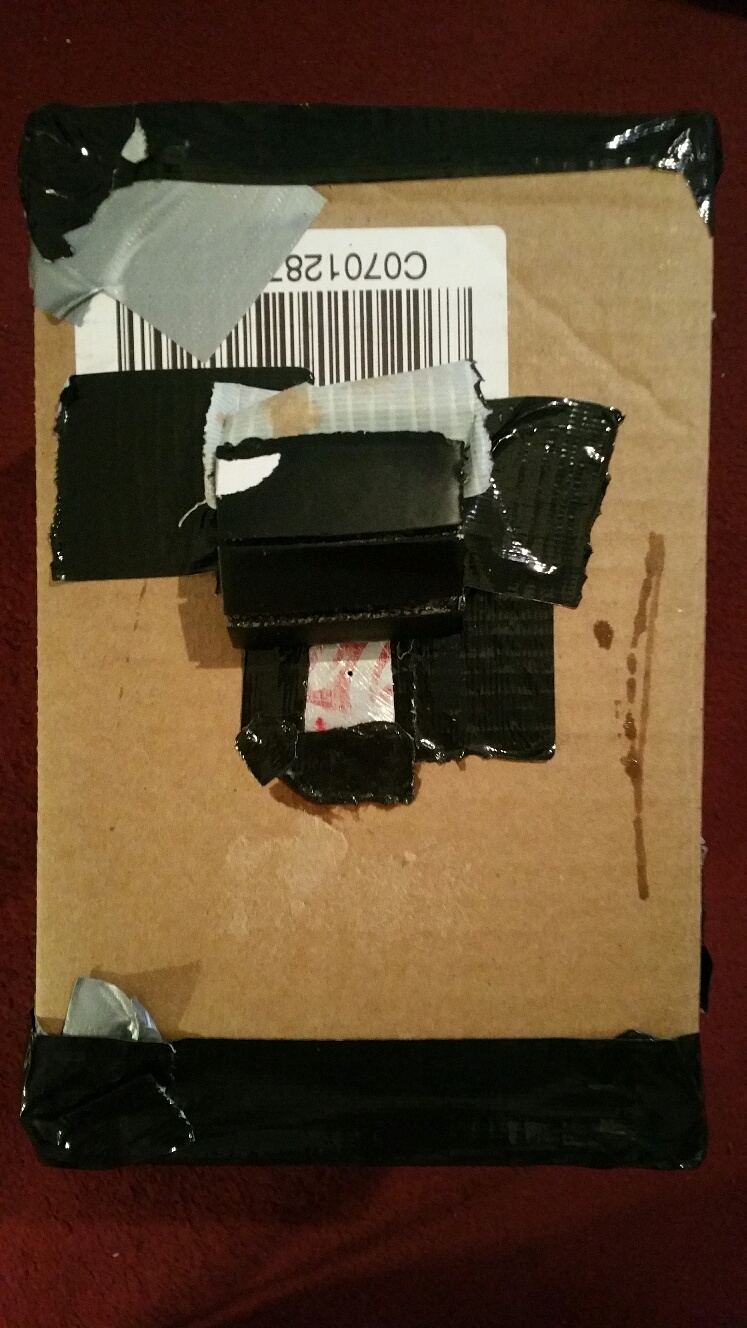
In unit 1 of Light, Sound, and Time, we explored more trigonometry and got in deep with it. We also talked about light, whether it is a particle or wave. Next we looked at colors, and how we are able to see colors, and what they are on the electromagnetic spectrum. We also looked at the human eye, and how it is similar to a camera. Leading me to the action project, we have to make a pinhole camera out of household materials, and create an image with it. With that we have to use the math we have learned and make similar triangles, from the box to what the image will be. The object used in the calculations is different from my actual image, because we needed something that was taller than the height of the pinhole camera. I really liked how we used household items to make a thing that can actually take a picture with film; it honestly amazes me that that is possible. Please enjoy seeing my camera, and the picture I was able to take with it.
2016-02-09_20.58.44.jpg
NVA "Pinhole Camera Side View" (2016) GCE Lab School. 
20160209_205514_resized.jpg
NVA "Pinhole Camera Top View" (2016) GCE Lab School. 
This device will capture light by having a small hole in the top, that will take light and put it inside the camera. When the light enters the camera, whatever image is showing will be flipped on the other side of the box; as shown below.
NVA "Light in Pinhole Camera Example" (2016) GCE Lab School. 
This camera doesn’t illustrate refraction, because refraction only happens when light goes from one medium to another, like air to water or glass, which will physically slow down the speed at which the light is going. Since there is only a hole, it won't slow down the speed of the light.  It is black on the inside because we don’t want the light going into the camera to reflect, because if it did it would ruin the image. When white, it will reflect it, so we make it black to stop the light from doing so. The camera shows light being a wave, because it does not collide with any other light waves. It shows or represents the electromagnetic spectrum, because black is absorbing all the colors that are going into the camera, and the only colors showing are from the image being shown into the camera. The light acts as a particle when it is interacting with the paper, because the particles give off energy and when that happens a chemical reaction happens within the paper, creating an image after going through the developing process.
2016-02-09_21.53.14_resized.jpg
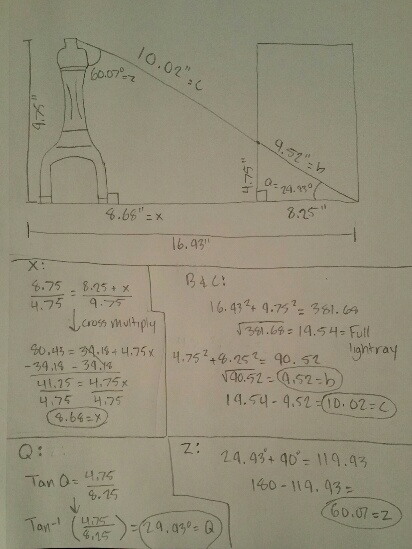
NVA "Pinhole Camera Similar Triangles" (2016) GCE Lab School. 
Above are the calculations I did for figuring out the similar triangles that go into taking the picture and the light ray going into the box. The hypotenuse of the triangle is the light ray from the top of the object going down to the bottom right corner of the camera. This is good for having to figure out the distance you need from your camera to your object, so that you can get all of the object in through the pinhole.
NVA "Yoshi Pinhole Picture" (2016) Latin School. 
For the picture, the shutter speed was about 3 minutes, so the film had enough time to absorb all of the light, leading to a better picture. If I were to do this again, I would play around with the times of the shutter speed, so I could get the perfect image. Also I would like to be able to re-position the camera, so that it could get everything in the picture a lot better. I had more objects, a yoyo and a Rubic cube, under the Yoshi that I wanted in the picture. I would probably want to put something underneath to raise the Yoshi and the things it was on.